Over-the-Air Updates with Bitrise CodePush
Beto, July 2026
There's a moment every mobile developer eventually hits: a bug is live in production, the fix is one line, and Apple's review process stands between you and your users for the next couple of days. Web developers just deploy. We wait.
Except you don't have to. Over-the-air (OTA) updates let you push JavaScript changes directly to installed apps, in minutes. And before you ask: yes, this is allowed. Apple's guidelines explicitly permit updating interpreted code like JavaScript, as long as the update doesn't change your app's primary purpose. Google is fine with it too. This isn't a gray area or a clever loophole, it's how React Native apps have shipped hotfixes for years.
The setup is a one-time thing, and honestly smaller than you'd expect. In this post I'll show you how OTA updates work under the hood, then walk through the full setup with Bitrise CodePush. I partnered with Bitrise for this integration, and one of the reasons I was happy to is their free tier: up to 100,000 monthly active users at no cost, so you can set this up today without paying anything. I'm using Inkigo, my AI tattoo app that's live on the App Store right now, as the real-world example. If you prefer video, I recorded the whole thing on YouTube, including the mistakes.
How OTA updates actually work
A React Native app is two layers:
- The native binary, the thing Apple actually installs on the device.
- A JavaScript bundle inside it, which is where most of your app lives: your screens, your logic, your styling.
An over-the-air update swaps that JavaScript bundle. The native layer never changes. That's the whole mechanism, and it's also the limit.
How OTA updates work: the update swaps the JavaScript bundle while the native binary stays untouched
You can ship over the air: a typo fix, a color change, a broken layout, a small feature, anything that's pure JavaScript.
You still need a store release for: a new native package, a new permission, an SDK upgrade, anything that touches native code.
You're updating your app, not replacing it. Use it for quick fixes and small features and you're completely in the clear on both iOS and Android.
The setup (one time only)
1. Create your app on Bitrise
Create a Bitrise account, go to Releases, and add a new application: give it a title, pick the OS, and set the bundle identifier from your . If you target both iOS and Android, you do this twice, one app per platform.
2. Create a deployment
Inside your app, open CodePush → Configuration → Deployments. Ideally you'll have one deployment per environment (Development, Staging, Production). Each deployment gives you a deployment key, save it, you'll need it in a minute.
Also grab your workspace slug from Settings → General. You need it for the server URL.
3. Install and configure the SDK
bun add @code-push-next/react-native-code-pushIf you're on Expo, it's just a config plugin in :
{
  "plugins": [
    [
      "@code-push-next/react-native-code-push/expo",
      {
        "ios": {
          "CodePushDeploymentKey": "your-deployment-key",
          "CodePushServerURL": "https://<workspace-slug>.codepush.bitrise.io"
        }
      }
    ]
  ]
}In a real app you'll have multiple environments, so convert to and swap the deployment key per environment. Bare React Native requires some native changes in and , the Bitrise docs walk you through it.
Then prebuild and recompile:
npx expo prebuild --platform ios --clean4. Wrap your app
CodePush wraps your root component with a higher-order component. With Expo Router, that's your root layout:
import codePush from "@code-push-next/react-native-code-push";

const codePushOptions = {
  checkFrequency: codePush.CheckFrequency.MANUAL,
  installMode: codePush.InstallMode.IMMEDIATE,
};

function RootLayout() {
  // your existing layout
}

export default codePush(codePushOptions)(RootLayout);controls when the app looks for updates. I'm using here so I can trigger it from a button, but or are what you'd typically use in production.
5. Check for updates
does the whole flow: check, download, install. The status callback is great for showing feedback to the user:
const handleCheckUpdate = () => {
  codePush.sync(
    { installMode: codePush.InstallMode.IMMEDIATE },
    (status) => {
      switch (status) {
        case codePush.SyncStatus.CHECKING_FOR_UPDATE:
        case codePush.SyncStatus.DOWNLOADING_PACKAGE:
        case codePush.SyncStatus.INSTALLING_UPDATE:
        case codePush.SyncStatus.UP_TO_DATE:
        case codePush.SyncStatus.UPDATE_INSTALLED:
        // map each stage to a label, spinner, whatever you want
      }
    },
    ({ receivedBytes, totalBytes }) => {
      // download progress, 0 to 100
    },
  );
};6. One store release first
Adding the CodePush SDK is itself a native change. The plugin injects native code for iOS and Android. So before you can push OTA updates, you need to bump your version, build, and ship that release through the store review process one last time. After that, JavaScript changes go straight to users.
Shipping an update
Once the setup release is live, shipping an update looks like this:
- Make your JavaScript change (in the video I changed Inkigo's primary color, one line).
- Export the bundle. With Expo Router, the entry file matters:
npx expo export:embed \
  --platform ios \
  --dev false \
  --entry-file node_modules/expo-router/entry.js \
  --bundle-output ./build/main.jsbundle \
  --assets-dest ./build

zip -r update.zip ./build-
Go to your deployment in Bitrise, click New update, set the target version, add a description ("new primary color", "quick fix"), drag in the zip, and release.
-
Users check for updates, the bundle downloads, the app restarts with the new code.
You can also set a rollout percentage, ship to 10% of users first, watch for issues, then ramp up. And everything I did through the website can be fully automated with Bitrise CI, or their API, so you can adopt it incrementally.
Made a mistake? Delete the update in the dashboard and clients roll back to the previous bundle on their next check. Or just push a new update on top.
Gotchas that got me
I hit every one of these on camera, so you don't have to:
- Copy the deployment key, not the deployment's unique ID. They look similar in the dashboard. The SDK will throw "needs a valid deployment key" if you grab the wrong one.
- Expo Router needs its own entry file. My first bundle crashed the app because I exported with the default entry point. Use .
- Expo API routes break the export. My app uses , and importing CodePush (native code) broke the web build. I created a no-op fallback for web and only wrap the layout on native.
- Target version must match the native binary. If you ship a bundle that isn't compatible with the native version it lands on, you can break the app for those users. Be careful with this one in production.
The one rule
The setup is a one-time thing. After that, JavaScript changes, fixes, styling, small features, ship straight to users in minutes. Just remember: if you add anything native, a package, a permission, an SDK upgrade, that build goes through the store and the review process. True for both iOS and Android.
You might go months without needing OTA updates. But the day you have a bug in production that's losing you money, being able to export a bundle and ship the fix in minutes is a massive advantage.
Watch the full setup
I recorded the entire process, from creating the Bitrise account to shipping a live update to Inkigo on a real phone, mistakes included. As a reminder, CodePush is free for up to 100,000 monthly active users. If you outgrow that, my code BETO25CP gets you 25% off the CodePush Pro plan, which covers up to 5 million monthly active users. That's a lot of room to grow.
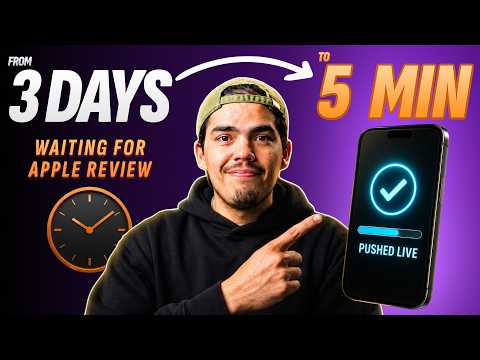
YouTubeOver-the-Air Updates with Bitrise CodePush
Watch me set up OTA updates from scratch and ship a real update to an App Store app in minutes.