App Store vs Google Play: What I Learned Publishing the Same App to Both
Beto, August 2026
I recently published the same habit tracker to the App Store and Google Play.
Same app. Same React Native and Expo codebase. Two completely different publishing experiences.
The basic requirements are easy to find. Apple charges $99 per year. Google charges a one-time $25 registration fee. You need Xcode for the local iOS path and Android Studio for the local Android path.
That is not the interesting part.
What matters are the decisions that can lock you into something, delay your release, or come back when you publish the next update. Here are seven things I learned before, during, and after shipping the same app to both stores.
Before you publish
1. Your app name can change, but its technical identity cannot
Every app has a technical identifier. Apple calls it a bundle identifier. Android calls it a package name. It usually looks something like this:
dev.codewithbeto.kojunThis value is not customer facing. Nobody is going to reject your app because the identifier is ugly, and users will probably never see it.
But once the app is published, every future update needs to keep that identity. Apple and Google use it to connect every uploaded build to the existing store listing.
So choose something connected to your brand and app name before the first upload.
If you already published an app with an ugly identifier, do not panic. It is usually not worth creating a completely new listing just to make a hidden value look prettier. Keep it and move on.
The useful distinction is simple:
- Your public app name and store copy can evolve.
- Your bundle identifier and package name should be treated as permanent.
2. Supporting iPad is a long-term commitment
This is one of those details I do not think enough developers know.
When preparing the iOS version, I set to . The app was ready for iPhone, but I had not designed and tested every screen for iPad yet.
Supporting iPad means more than allowing the app to open on a larger screen. It means:
- Testing every screen on iPad.
- Making sure layouts work across more sizes.
- Creating the required iPad store assets.
- Continuing to support those users in future updates.
Apple does not generally let an update restrict devices that previous versions supported because existing customers still need to receive updates. You can read more in Apple's device compatibility documentation.
This does not mean every new app should disable tablet support. It means you should choose intentionally.
For a first release, I would rather support iPhone properly and add a polished iPad experience later than claim support on day one and spend every future update fighting layouts I never designed.
If you are preparing your iOS release, I recorded the complete process from creating the local build to submitting it through App Store Connect:
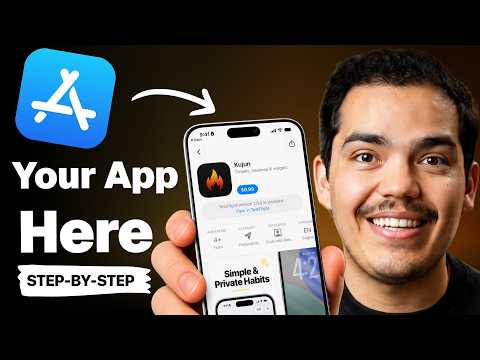
YouTubeHow to Publish Your App to the App Store
Build, upload, configure App Store Connect, and submit your iOS app for review.
3. Your Google developer account type can change the launch by weeks
Google Play offers Personal and Organization developer accounts. Both can publish and monetize apps, so this is not about getting a more powerful dashboard.
The important difference is what Google requires before you can reach Production.
New Personal developer accounts need to run a closed test with at least 12 testers continuously opted in for 14 days before they can apply for production access. Internal testing does not satisfy this requirement. Google explains the complete process in its testing requirements for new Personal accounts.
I hit this while publishing my own app.
My original account was Personal, so Production was locked. I would have needed 12 testers for 14 days for this application. If one tester left during the period, that could delay the process again.
In my case, converting to an Organization account made sense. I already had Code with Beto LLC, a D-U-N-S number, and the matching business information. The switch itself took me around 20 minutes because I already had everything ready.
That does not mean you should create a fake company to skip the test.
Google says Organization accounts are for legitimate businesses and organizations. The verification process requires a D-U-N-S number, an official government ID from someone authorized to represent the organization, and official organization documents. Depending on your country, that can include a driver's license or another government ID plus business registration or tax-authority documents. The legal name and address also need to match your payments profile and D-U-N-S record. Google documents the complete identity verification process.
Google currently recommends waiting at least 72 hours after converting an account before submitting a new app, even though my own transition appeared much faster. Keep that in mind if you are planning a launch around the switch.
If you are a student, hobbyist, or individual developer, use a Personal account and plan for the closed test. Recruit more than 12 people so one person leaving does not restart your clock. Friends, coworkers, existing users, and legitimate developer testing communities are all better options than trying to fake an Organization account.
I understand why Google wants real testing. Android runs across a massive range of devices. But I also think this rule makes publishing unnecessarily difficult for indie developers who want to validate a small idea. It is not surprising that some developers release the iOS version first and keep postponing Android.
For the complete Android process, this walkthrough covers the signed bundle, Play Console setup, testing requirements, and Production release:
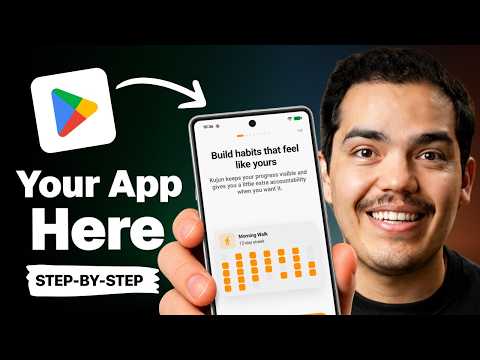
YouTubeHow to Publish Your App to Google Play
Create the signed bundle, configure Play Console, complete the required forms, and release to Production.
4. Free versus paid is more nuanced than it looks
I published the iOS version of the app for $0.99. For Android, I initially selected free.
There are two different monetization decisions hiding here:
- Charging people before they download the app.
- Letting them download for free and selling features, content, or subscriptions through in-app purchases.
Most mobile apps use the second model. A free listing can still make money through in-app purchases and subscriptions. Selecting free does not mean your business model has to be free forever.
The restriction is specifically about the upfront download price on Google Play. Once an app has been offered for free, Google does not let you turn that listing into a paid download. You would need a new app with a new package name. A paid app can become free later. Google explains this in its app-pricing documentation.
So the decision depends on what you are selling:
- If the complete app is a simple one-time purchase, setting an upfront price is the easiest path.
- If the app has subscriptions, consumable credits, or paid features, a free download with in-app purchases is usually the better model.
- If you truly want a paid download on Google Play but you are unsure about the final price, I would start paid. You can make it free later, but you cannot go in the other direction.
In-app purchases add another layer of setup inside your app, App Store Connect, and Google Play Console. I cover the implementation with RevenueCat in this course lesson:
LessonIn App Purchases
A focused 15-minute lesson on implementing in-app purchases with RevenueCat and connecting the store setup.
During the release
5. Expo developers need to understand what Prebuild owns
The publishing process works with any mobile stack, but React Native and Expo add one important mental model.
During development, you will usually work with a development build. When it is time to publish, you need a release build signed for distribution.
You can create that release locally using Xcode and Android Studio, or use a cloud build service such as EAS Build. Both paths eventually use the same native platform toolchains and signing credentials.
For an Expo project, generates the native and directories from your app configuration. The option deletes those directories and creates them again. Expo documents this behavior in its Continuous Native Generation guide.
That means you should not casually edit files inside the generated native folders. Those changes can disappear the next time you run Prebuild.
Instead:
- Keep app-level values in or .
- Use config plugins for native changes that need to survive regeneration.
- Run Prebuild again to apply those changes to the native projects.
- If you intentionally maintain the native projects by hand, treat that as a different workflow and do not delete them with .
For Android, I created the signed App Bundle locally in Android Studio. If you do the same, save the keystore file, alias, and passwords. The AAB is replaceable. Your credentials are the important part.
6. Android has two signing keys, not one
Apple's automatic signing hides most of the signing complexity for a normal App Store release. Select your team in Xcode, enable automatic signing, and Xcode handles the certificates and provisioning profiles.
Android makes the pieces more visible.
When you publish a modern Android App Bundle with Play App Signing, two keys have separate jobs:
- Upload key: This lives inside the local file. You use it to sign the AAB before uploading it.
- App-signing key: Google protects this key and uses it to sign the optimized APKs people actually install.
Google verifies your upload, generates the APKs for different devices, and signs those APKs with the app-signing key. Android's official documentation explains the complete Play App Signing flow.
This separation is good news.
If you lose the upload key, you can request an upload-key reset without creating a new app or losing your users, reviews, and listing. That is very different from losing the final signing key for a legacy app that does not use Play App Signing.
You should still protect the local keystore:
- Never commit it to GitHub.
- Keep encrypted backups in more than one place.
- Store the alias and passwords in a password manager.
- Do not create a new key every time you change build providers.
There is one more detail that catches people. If Google Sign-In, Firebase, Maps, App Links, or another provider asks for a production certificate fingerprint, you usually need the app-signing certificate from Play Console. The local upload-key fingerprint is not the signature customers receive on their devices.
After you submit
7. Approval does not have to mean immediate release
On iOS, passing review and making the app public can be two separate moments.
App Store Connect lets you release the app automatically after approval, release it automatically no earlier than a date you choose, or release it manually once approved. If automatic release is selected, approval can make the version available before the rest of your launch is ready.
For most launches, I recommend manual release. The version can reach Pending Developer Release while you finish your campaign, coordinate with a marketing team, or simply do one last readiness check. When everyone is ready, you release it yourself.
Manual release gives you control after approval. It does not make the review time predictable.
Once the Google Play setup was finally complete, my production release was approved in about 15 minutes.
That was funny because the review itself was the fastest part of the entire process. Setting up the account, signing the bundle, testing, creating the listing, completing the policy forms, and unlocking Production took much longer.
But I would never promise that your app will also be reviewed in 15 minutes.
Review time depends on the app, account history, permissions, policies, reviewer workload, and whether the submission raises new questions. Sometimes Apple or Google reviews an app quickly. Other times it sits there much longer than expected without a useful explanation.
Build that uncertainty into your release plan:
- Leave room for a rejection, a fix, and another submission.
- Test the store build, not only the development build.
- Save reviewer messages and respond with clear reproduction steps.
Apple also offers expedited reviews for real emergencies, such as a critical production bug or an event directly connected to your app. I have requested them a couple of times, and in my experience they were approved in around five minutes. That is not guaranteed, and it is not something to abuse.
YouTubeApple Can Approve Your App in 5 Minutes
When an expedited App Store review is appropriate and how quickly it worked in my case.
If your app uses React Native or Expo, over-the-air updates can also help with compatible JavaScript and asset fixes while you prepare the next store release. They do not replace a binary update when native code changes, and they should not be treated as a way around store policies. Think of them as a safety net for the types of changes they are designed to handle.
Ready to ship your React Native app?
The React Native course goes deeper with 75 minutes on App Store and Google Play publishing, plus complete lessons on EAS Build, Submit, Update, and Workflows.
CourseShip your React Native app
Go from development builds to production with complete publishing and EAS lessons.